centos6.9下配置https服务器
购买高质量高服务器的集群云服务器请到 www.01ip.cn 咨询
专业团队提供https证书、网站安全加密、nginx反向代理、301跳转
centos6.9下配置https服务器
1.1 环境
l 系统环境:内核环境为2.6.32版本 64位的CentOS release 6.8 (Final)
[root@localhost ~]# uname -a
Linux localhost 2.6.32-696.3.1.el6.x86_64 #1 SMP Tue May 30 19:52:55 UTC 2017 x86_64 x86_64 x86_64 GNU/Linux
[root@localhost ~]# cat /etc/redhat-release
CentOS release 6.9 (Final)
l 网络环境:确保能够访问网络
[root@localhost ~]# ping -c 2 www.baidu.com
PING www.a.shifen.com (220.181.112.244) 56(84) bytes of data.
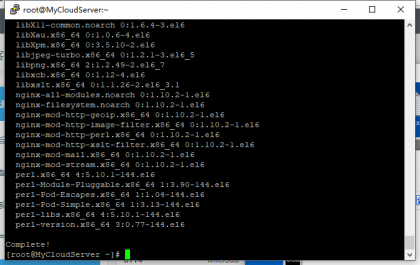
1.2 安装nginx:这里直接使用yum安装
友情提示:
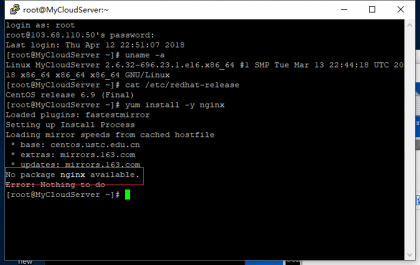
如果出现No package nginx available.
请运行: yum install epel-release
[root@localhost ~]# rpm -q nginx
nginx-1.10.2-1.el6.x86_64
可以看到yum 安装的nginx的版本为nginx-1.10.2
1.3 上传已经相关证书
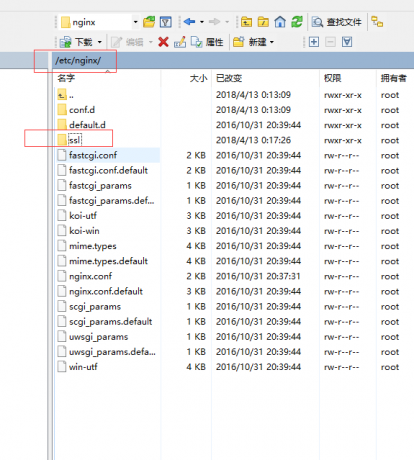
提示:如果这里不熟悉命令可以直接下载winscp 登陆 进行可视化创建文件目录上传证书
创建目录并进入ssl目录
[root@localhost ~]# mkdir -p /etc/nginx/ssl
[root@localhost ~]# cd /etc/nginx/ssl
上传文件(此处可根据具体情况上传文件)
[root@localhost ssl]# yum install -y lrzsz
[root@localhost ssl]# rz -y
弹出对话框,双击选中相关证书文件点击ok上传到服务器/etc/nginx/ssl目录下
1.4 配置nginx文件
清空原有的ssl.conf文件
[root@localhost ssl]# >/etc/nginx/conf.d/ssl.conf
加入以下内容,并根据自己的需求更改IP,域名和证书文件
[root@localhost ssl]# cat /etc/nginx/conf.d/ssl.conf
#
# HTTPS server configuration
#
proxy_connect_timeout 60;
proxy_send_timeout 120;
proxy_read_timeout 360;
proxy_buffer_size 256k;
proxy_buffers 128 32k;
proxy_busy_buffers_size 512k;
proxy_temp_file_write_size 256k;
proxy_max_temp_file_size 128m;
proxy_redirect off;
proxy_headers_hash_max_size 51200;
proxy_headers_hash_bucket_size 6400;
proxy_next_upstream error timeout invalid_header http_500 http_503 http_404;
proxy_temp_path /dev/shm/proxy_temp;
proxy_cache_path /dev/shm/proxy_cache levels=1:2 keys_zone=cache_one:300m inactive=1d max_size=1g;
gzip on;
gzip_min_length 1k;
gzip_buffers 16 16k;
gzip_http_version 1.1;
gzip_comp_level 2;
gzip_types text/plain application/x-javascript text/css application/xml;gzip_vary on;
upstream www_server {
server xxx.xxx.xxx.xxx:8080 max_fails=3 fail_timeout=30s;
}
server {
listen 443 ssl;
server_name *.123456.com 123456.com;
ssl_certificate ssl/123456.com.crt;
ssl_certificate_key ssl/123456.com.key;
ssl_protocols TLSv1 TLSv1.1 TLSv1.2;
ssl_ciphers ECDHE-RSA-AES256-SHA384:AES256-SHA256:RC4:HIGH:!MD5:!aNULL:!eNULL:!NULL:!DH:!EDH:!AESGCM;
ssl_prefer_server_ciphers on;
location / {
proxy_set_header Host $host;
proxy_set_header X-Real-IP $remote_addr;
proxy_set_header REMOTE-HOST $remote_addr;
proxy_set_header X-Forwarded-For $remote_addr;
proxy_pass http://www_server;
}
location ~ .*\.(jpg|jpeg|gif|png|swf|css|js|txt|htc|ico)?$ {
proxy_cache cache_one;
proxy_cache_key $host$uri$is_args$args;
add_header Cache "$upstream_cache_status";
proxy_cache_valid 200 304 30m;
proxy_cache_valid 404 500 502 503 504 3s;
proxy_cache_valid any 1h;
expires 2h;
proxy_set_header Host $host;
proxy_set_header X-Real-IP $remote_addr;
proxy_set_header REMOTE-HOST $remote_addr;
proxy_set_header X-Forwarded-For $remote_addr;
proxy_pass http://www_server;
}
}
备注:红色地方为需要自己更改的地方
备注:xxx.xxx.xxx.xxx 为您需要增加的后端的IP
1.5 检查配置并启动nginx
检查配置:是否正确(看到ok和successful表示配置正确)
[root@localhost ~]# /etc/init.d/nginx configtest
nginx: the configuration file /etc/nginx/nginx.conf syntax is ok
nginx: configuration file /etc/nginx/nginx.conf test is successful
启动服务
[root@localhost ~]# /etc/init.d/nginx start
Starting nginx: [ OK ]
[root@localhost ~]# netstat -lnptu|grep "nginx"
tcp 0 0 0.0.0.0:80 0.0.0.0:* LISTEN 15260/nginx
tcp 0 0 0.0.0.0:443 0.0.0.0:* LISTEN 15260/nginx
可以看到已经开启了80和443端口,表示nginx已经启动成功
1.6 防火墙设置
防火墙应根据服务器具体情况配置:
这边防火墙配置如下:
[root@localhost ~]# cat /etc/sysconfig/iptables
*filter
:INPUT ACCEPT [0:0]
:FORWARD ACCEPT [0:0]
:OUTPUT ACCEPT [0:0]
-A INPUT -m state --state ESTABLISHED,RELATED -j ACCEPT
-A INPUT -p icmp -j DROP
-A INPUT -i lo -j ACCEPT
-A INPUT -p tcp -m state --state NEW -m multiport --dports 22 -j ACCEPT
-A INPUT -p tcp -m state --state NEW -m multiport --dports 80,443 -j ACCEPT
-A INPUT -j REJECT --reject-with icmp-host-prohibited
-A FORWARD -j REJECT --reject-with icmp-host-prohibited
COMMIT
重启防火墙
[root@localhost ~]# /etc/init.d/iptables restart
到此https配置基本完成。
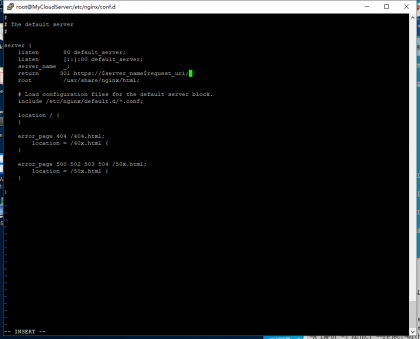
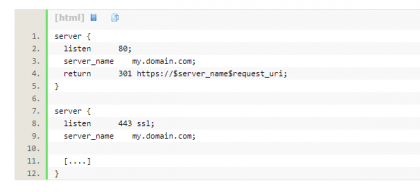
最后nginx 301 跳转
return 301 https://$server_name$request_uri;


